

Hey friends,
I just joined the selfie video trend (just for fun!). And it seems a lot of people are curious about how to make it.
Here’s a quick rundown, and at the end I also give a peek on how I automated the whole thing. Enjoy!
p.s. original idea and base prompts are from the great @pabloprompt. His dragonball video already has 83M+ views!
***
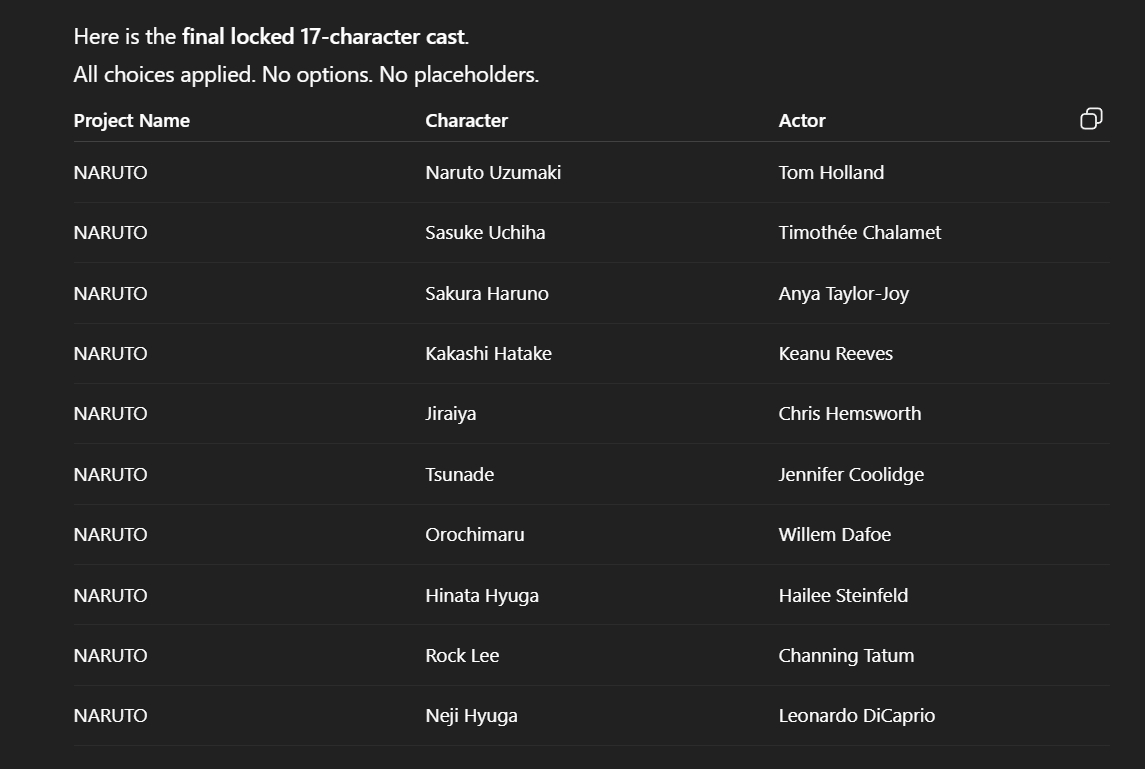
Step 1: ChatGPT for ideas
Ask ChatGPT (or any LLM you use) with ideas for the characters and actors. Chat with it a bit to replace any character or actor if you wish! Here’s the list I did for the Naruto piece:
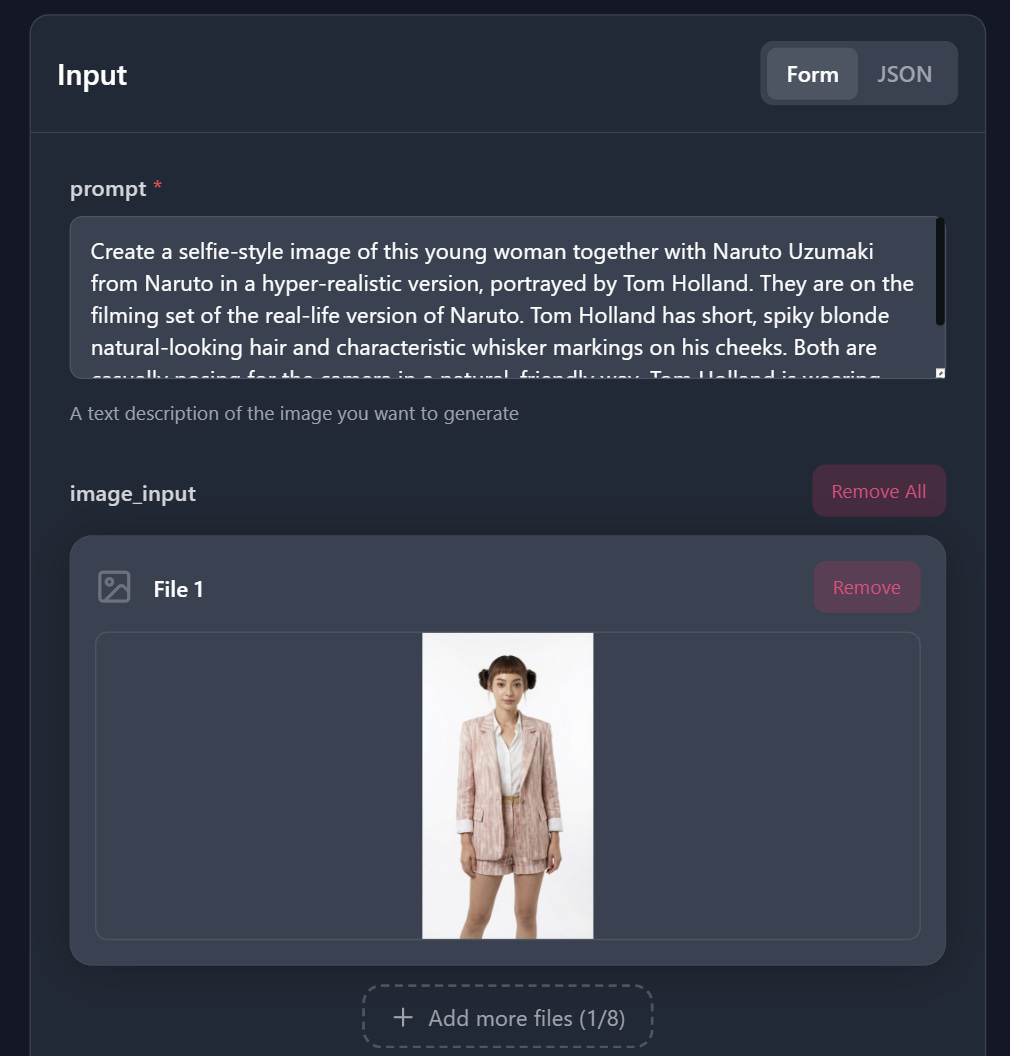
Step 2: Create the Images with Nanobanana Pro
If you’re doing it manually, I can recommend Kie AI’s Nanobanana Pro instance since they’re offering it the cheapest (9 cents per image, without needing a monthly subscription).
You can of course use Higgsfield or Freepik or Gemini if you already have subscriptions with those.
The base prompt is as follows. Just ask ChatGPT to give you the prompt for each of the characters and use that in Kie AI with your own photo attached!
Create a selfie-style image of this young woman together with Goku from Dragon Ball Z in a hyper-realistic version, portrayed by Brad Pitt. They are on the filming set of the real-life version of Dragon Ball Z. Brad Pitt has long, yellow, very natural-looking hair. Both are casually posing for the camera in a natural, friendly way. Brad Pitt is wearing Goku’s classic combat outfit. The film set includes Dragon Ball Z details. She is not holding anything in her hand. No mobile phones. No phones in hands. She is wearing the same attire as in the reference photo
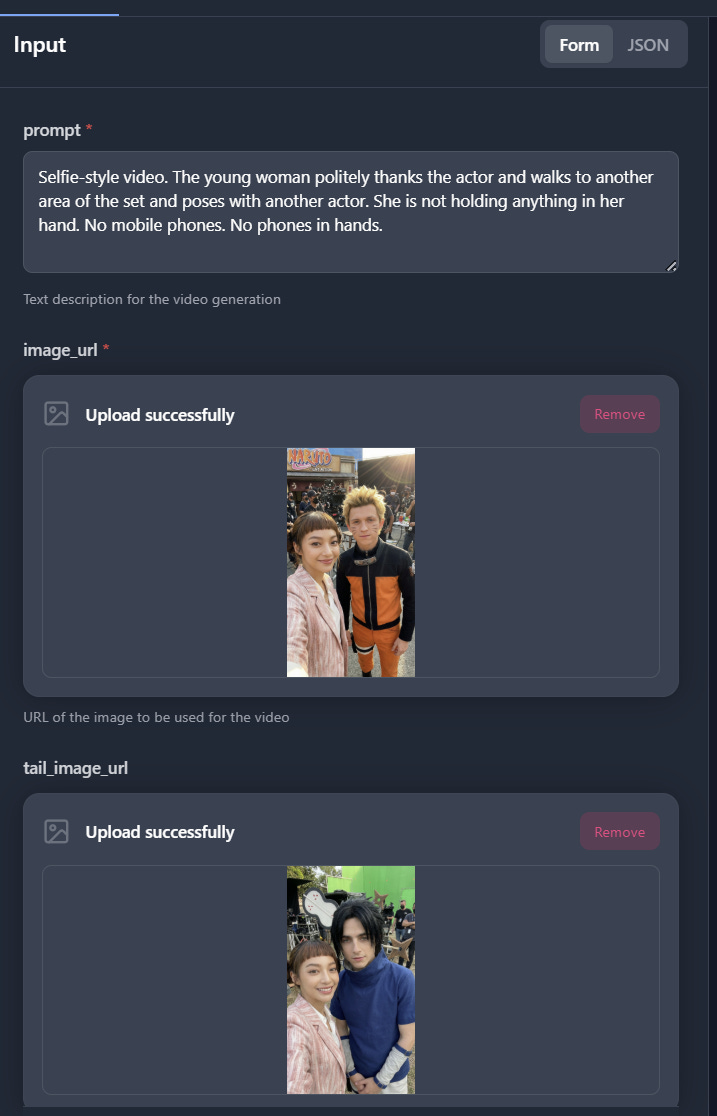
Step 3: Create the Videos with Kling 2.5
Use Kling 2.5’s first and last frame to generate the clips (Kie AI has the cheapest once again).
Kling is great because it’s very precise - in that when it generates the clips and you stitch them together, the transitions between scenes is seamless. (Veo 3.1 has a problem with this for some reason)
The transition prompt to use is
Selfie-style video. The young woman politely thanks the actor and walks to another area of the set and poses with another actor. She is not holding anything in her hand. No mobile phones. No phones in hands.
When that’s all complete, just stitch your videos together using any video editing tool like Premiere or Capcut and you’re done!
***
That’s the way to do it if you want to do it manually - which will probably take you an hour or two depending on how many scenes you do.
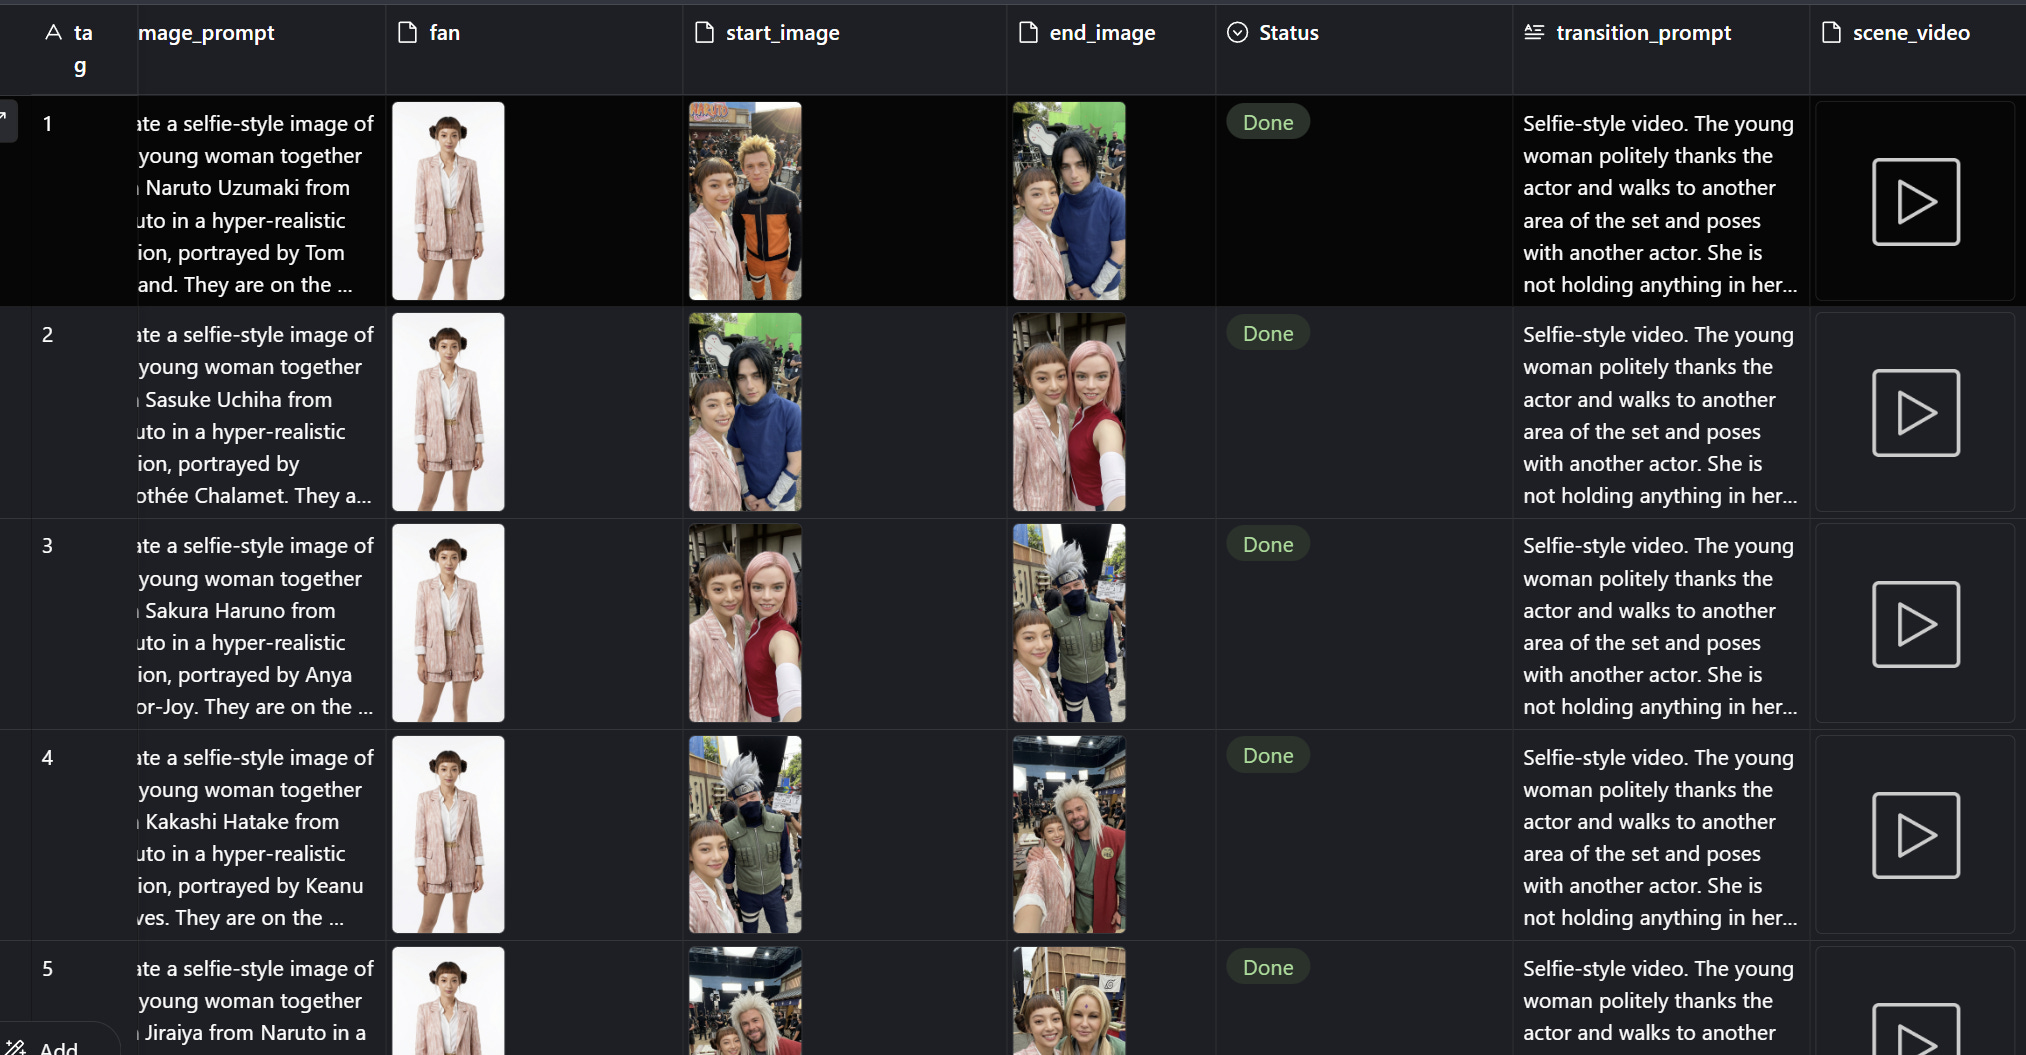
In reality though - I did all 17 scenes in sub-30 minutes because I automated the whole thing using n8n and airtable. It’s a bit difficult to explain in a post, so I have a video here so you can see something like it in action.
And if you want to learn this skill deeper, we teach all of it over at the RoboNuggets Community. It’s mainly for AI-native creative agencies and practitioners who want to create with AI professionally (check that out if that’s for you!)
Hope you learned something new with this one.
And happy holidays!
Jay
